How to significantly reduce airborne particles with a rubber dam
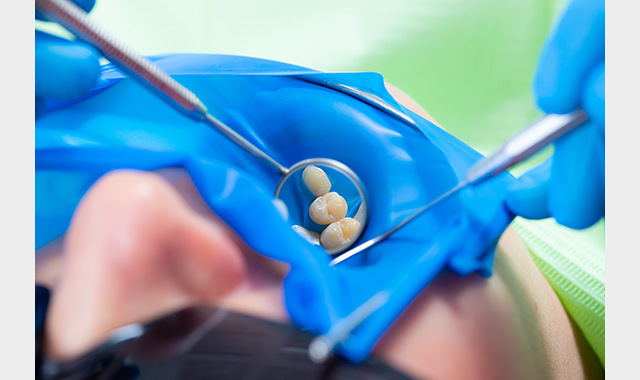
When dental devices work in the patient’s oral cavity, a large amount of aerosol and droplets will be generated. The use of a rubber dam can help stop the spread of these particles.
This article is eligible for 2.0 hours of continuing education credit from the Academy for Chairside Assisting and Dental Products Report.

The airborne spread of severe acute respiratory syndrome coronavirus 2 is well reported in literature. Documentation shows many procedures in dentistry produce aerosols and droplets that are contaminated with the virus.1 Dental practices have many concerns about droplets and aerosol transmission of coronavirus disease 2019 (COVID-19), as the particles from droplets or aerosols are small enough to stay airborne for an extended period before settling on environmental surfaces or entering the respiratory tract.2
Now more than ever, the use of a dental rubber dam is necessary for handpieces with rotating turbines at a high speed.
COVID-19 has the potential to spread through droplets and aerosols from infected individuals in dental clinics and hospitals.3 When dentists work with devices in the patient’s oral cavity, a large amount of aerosol and droplets mixed with the patient’s saliva—or even blood—will be generated.
A survey last year noted that less than 10% of practices were using a dental rubber dam. The No. 1 reason at the time was lack of proper training and time.4 Documentation proves the placement of a rubber dam significantly reduces airborne particles in a 3-foot diameter of the operational field by 70% during a procedure.
Before beginning the rubber dam application, dentists should tell patients what to expect and explain why they are using a rubber dam. Many patients have not been exposed to the dam and may not understand or fear its use. There is much to learn about the rubber dam and its benefits in operative dentistry. Below is a comprehensive list of dental dam materials and equipment, as well as guidance on their proper uses.
Materials and Equipment
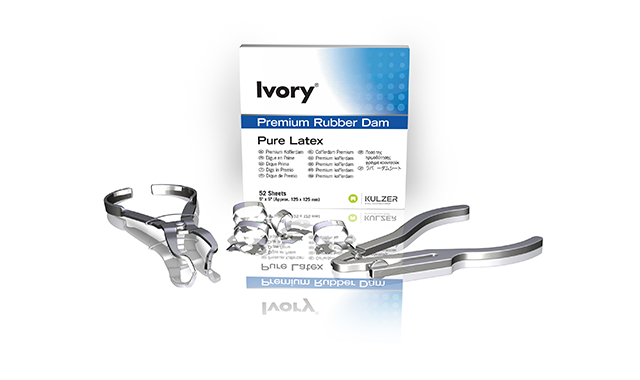
The dental dam procedure requires a variety of instruments and materials. The materials and equipment may be on a separate tray or stored at the dental unit or in a tub for easy use. Contents typically include the dental dam material, dental dam napkin, dental floss, tape, dental dam clamps, forceps, frame, punching guides, and punch (Figure 1).
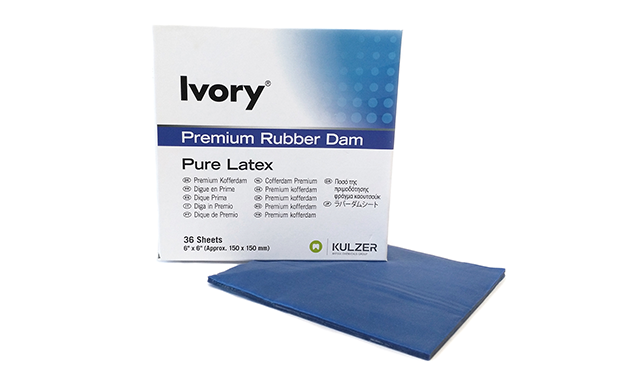
The Ivory Premium Rubber Dam from Kulzer is a pure latex dental dam.

The dental dam is a latex or latex-free material supplied in various sizes, weights, and colors selected according to the operator preference. The most common sizes of the dental dam are 5 × 5-in or 6 × 6-in precut squares. These squares usually come in a box of 50 or more and are lightly powdered on one side to prevent sticking.
A dental dam is available in different weights (thicknesses), including thin, medium, heavy, extra heavy, and specialized heavy. Various colors (shades) are also available, including dark gray or green and lighter pastels. The darker shades provide more contrast with the teeth and make it easier for the operator to see.
A rubber dam stamp or rubber dam template can help the dental clinician accurately mark tooth positions, whereas the dental dam napkin provides comfort between the rubber dam and the patient’s skin. The dental dam napkins are disposable and made of soft, precut, absorbent fabric, reducing possible allergic reactions. The dental dam napkin also absorbs saliva, water, and sweat.
The frame or holder is designed to stretch and secure the dam in place across the patient’s face. The frame stabilizes the dental dam and keeps the operating area open. Frames are made of metal or plastic and have small projections around the borders to secure the dental dam.
Similar to a paper punch, a dental dam punch has a handle and a working end. The working end of the punch has a stylus—a sharp projection to punch through the dam—and a punch table or plate. The punch has a rotating metal disk with up to six holes of various sizes and a tapered, sharp-pointed plunger.
The clinician adjusts the dental dam punch table, making sure each tooth that is isolated is centered under the stylus before the punch is applied. The clinician should punch the holes of the dental dam according to the patient’s arch. An improper cut hole will result in a nick or a tag that may cause the dam to rip at placement before the procedure. Smaller holes are better suited for incisors, canines, and premolars, whereas larger holes are better for molars, the posterior anchor tooth.
Additional Items
Proper rubber dam placement may require other items. These could include scissors for cutting the dental dam material and floss, which can be used through contacts and help secure anchor clamps. Other items include forceps and clamps.
Additional tools and equipment are needed to use a dental dam.

Clinicians should use dental dam forceps to place and remove the dental clamp. The forceps has two prongs that fit into the holes of the jaws of the clamp, engages the clamp, and enables activation during placement and removal of the clamp.
Dental dam clamps are supplied in a variety of designs and sizes to fit around the teeth and stabilize and secure the dental dam material (Figure 2). Clinicians should always select a rubber dam clamp that maintains a 4-point contact with the tooth’s proximal surface. If a clamp is too large, it will impinge on the soft tissues. If it’s too small, it will not grasp the tooth’s surface and will be unstable. The bow of a clamp should be positioned on the distal of the tooth (Figures 3-6).
The specific type of clamp is identified by a number. A clamp number followed by an A identifies a clamp with subgingival jaws. Clamps are separated into two categories, winged and wingless. Winged clamps have projections at the jaw, whereas wingless clamps are identified by a W proceeding its number.
Preparation before placement
Determine the tooth to be restored, and then determine the anchor tooth, which is usually 1 or 2 teeth distal to the tooth being restored. A good technique for learners is to punch to the canine of the opposite quadrant.
- Posterior isolation: Include one tooth distal to the tooth (teeth) being treated and extend to midline
- Anterior isolation: Include premolar to premolar.
- Single-tooth isolation (endodontic and sealants): Include only the tooth being treated.
Examine the size and shape of the arch so they can be duplicated on the dental dam as carefully as possible to match the patient’s arch. Examine the area for missing teeth, teeth that are out of alignment, or fixed prosthetics. The dental dam is punched accordingly. Identify tight contacts and open spacing.
Placement of the dental dam
Be sure to examine the oral cavity to determine the anchor tooth, the shape of the arch, tooth alignment, missing teeth, and the presence of crowns and bridges (Figures 7-8). Also, examine the gingival tissues, and check for tight contacts. Next, prepare the dam material by dividing it into sixths, then punch the dam, aligning the stylus and the holes carefully. Center the punch in the upper or lower middle third of the dental dam.
Holes are punched according to the size of the tooth, the keypunch being the largest to accommodate the anchor tooth and the clamp, and holes should be punched following the pattern of the patient’s arch. Lubricate the dental dam on the tissue side with a water-soluble lubricant and select the clamp or several clamps to try on the tooth. Attach a safety line (floss) on all clamps to keep the end of the safety line in hand.
Secure the clamp on the clamp forceps, and spread the jaws slightly to lock the forceps. Place the clamp over the anchor tooth. To widen the jaws of the clamp, squeeze the forceps handle slightly to release the locking bar. Fit the lingual jaws of the clamp on the lingual side of the tooth first (Figure 9). Then spread the clamp and slide the buccal jaws of the clamp over the height of contour of the buccal surface of the tooth (Figure 10). Release the pressure on the clamp forceps slightly against the tooth to evaluate the clamp, but do not release the clamp from the forceps.
The jaw points of the clamp should be at the cementoenamel junction, adapting to the gingival embrasures on the buccal and lingual. The clamp should be secure on the tooth, not pinching any gingival tissue. Place the dental dam over the clamp bow by grasping the dam material and placing the index fingers on each side of the keyhole punch. Spread the hole wide enough to slip over the clamp. Stretch the hole over the anchor tooth and one side of the clamp, then expose the other clamp jaw so the entire clamp and anchor tooth are exposed. Pull the safety line through the dam and drape it to the side of the patient’s mouth. Isolate the most forward tooth, usually the opposite canine.
The dam material is secured on the distal of this tooth with a double loop of floss, a corner cut of the dental dam material, or a stabilizing cord. Place the dental napkin around the patient’s mouth. Place the frame or holder to stretch the dam, covering the oral cavity.
The frame can be placed either under or over the dental dam material, depending on the type of frame and the preference of the operator. Beginning with the most anterior contact with rubber septum not already passed, floss a minimum of twice for each contact, to pass septa of the dam through the proximal contacts.
Isolate the remaining teeth, gently working the dental dam between the contacts with dental floss. Invert the edges of each hole around the tooth by simultaneously drying and turning edges under with a sweeping motion of the cord instrument. If teeth have small or absent cingulum, wrap floss around the lingual surface, and invert the entire lingual of the tooth at once by positioning the edge of the hole below the height of contour using cord instrument and floss, then air-drying prior to removing floss. If absolutely necessary, the anterior tooth may be ligated by tying this loop of floss on the facial, but trauma to the proximal gingival attachments is likely. Using the air syringe to dry the teeth at this time facilitates the placement of the dam material.
Removal of Dental Dam
When the operator is ready to remove the dental dam, the area is rinsed and dried using the evacuator and the 3-way syringe. Explain to patients the procedure to remove the dental dam and caution them not to bite down when the dam is removed.
The correct placement of a dental dam can be quick if clinicians follow and understand these steps. Practicing ensures familiarity with the materials, making for easy rubber dam placement.
For CEU course information, download this course description.
To obtain your 2.0 CEUs for this article click here for the post-test.
References
- Lu C-W, Liu X-F, Jia Z-F. 2019-nCoV transmission through the ocular surface must not be ignored. Lancet. 2020;395(10224):e39. doi:10.1016/s0140-6736(20)30313-5
- To KK, Tsang OT, Chik-Yan Yip C, et al. Consistent detection of 2019 novel coronavirus in saliva. Clin Infect Dis. Published online February 12, 2020. doi:10.1093/cid.ciaa149
- Rothe C, Schunk M, Sothmann P, et al. Transmission of 2019-nCoV infection from an asymptomatic contact in Germany. N Engl J Med. 2020;382(10):970-971. doi:10.1056/nejmc2001468
- Samaranayake LP, J Reid, D Evans. The efficacy of rubber dam isolation in reducing atmospheric bacterial contamination. ASDC J Dent Child. 1989;56(6):442-444.
- Samaranayake LP, Peiris M. Severe acute respiratory syndrome and dentistry: A a retrospective view. J Am Dent Assoc. December 2014. doi:10.14219/jada.archive.2004.0405
