Why you should always clean restorations after try-in
The battle against contamination can mean life or death for a restoration.

It’s no secret that contamination can be a major contributing factor to restoration failure. Having an unclean or contaminated bonding surface can jeopardize the bond strength between a restoration and the tooth, which can ultimately lead to adhesion issues, debonding and overall restoration failure.
As a result, much consideration is given to ensuring that the field and the tooth itself are properly cleaned and decontaminated-rubber dams, cotton, or isolation tools like Mr. Thirsty or Isolite all help ensure the tooth’s bonding sites remain clean, dry, and ready for bonding.
“It’s obviously so important to get a good bond,” says Dr. Jennifer Sanders, a general dentist in private practice in Frenchtown, Mont. “It’s all about isolation; avoiding contamination in the field leads to a strong bond that hopefully lengthens the life of the restoration.”
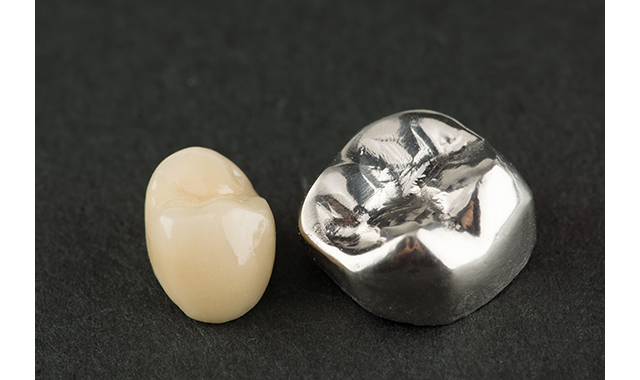
But what about the other side of things? It doesn’t matter how clean the tooth is if the intaglio (inside surface) of prosthetic restorations is full of contaminants. And no matter how sparkling clean the intaglio is before try-in, as soon as a crown is placed in the mouth, it’s going to be dirty or contaminated.
“Contamination when trying in permanent prostheses can truly be a problem,” says Dr. John Flucke, DPR’s technology editor who practices in Lee’s Summit, Mo. “But cleaning can make such a difference.”
Saliva challenges
Unfortunately for dentists, the mouth actively works against keeping surfaces dry and contaminant-free. The obvious culprit: Saliva. Saliva coats the nooks and crannies of everything-including the inside surface of prosthetic restorations during intraoral try-in.
Research has shown this can create big complications. One University of Bristol study examining the effects of saliva on resin cement-bonded porcelain surfaces found that salivary contamination in porcelain veneers greatly reduced bond strength between the porcelain and the cement. “Contamination of the fitting surfaces of porcelain veneers with saliva at the try-in stage is almost inevitable,” the study states. “And contamination was determined to be detrimental to the resin cement-to-porcelain bond.” Ultimately, the study found that this detrimental contamination during try-in weakened bonds by over 60 percent.1
“Saliva has a lot of components in it that can stick to the inside of crowns and interfere with bond strengths,” Dr. Flucke says. “Eliminating those contaminants goes a long way to having a great long-term restoration.”
The components Dr. Flucke refers to are called phospholipids. These phosphate groups are contained in saliva, and actively bond with external surfaces (such as the intaglio of restorations, like crowns). The bonded phosphate groups then deplete the number of available bonding sites, resulting in weaker bonds.
“Saliva is the enemy of bond strength,” Dr. Flucke explains. “In my opinion, the hardest part of cementing is controlling the field.”
While a little bit of saliva may not seem like a big deal (just wash it off, right?) decontamination can be complicated, and water alone isn’t a solution. Because of the bonds formed between the phosphate groups and the restoration surface, simply rinsing saliva off of a crown after try-in won’t solve the problem. You’ve got to call in the big guns.
Fighting contamination
Your strategy in the decontamination battle depends on the material you are working with. For example, for all-ceramic restorations, hydrofluoric acid and silane can be used for cleaning. With glass-ceramic restorations, phosphoric acid gel can do the trick.
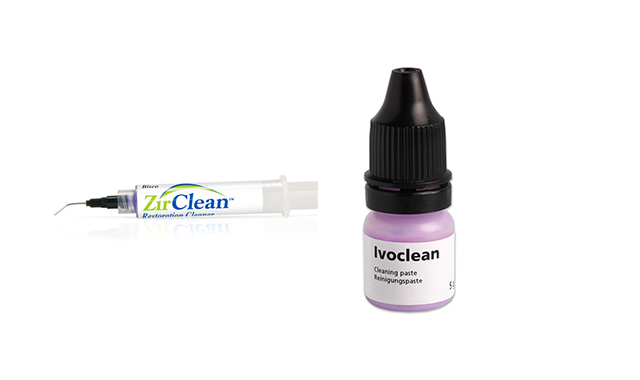
In contrast, metal and zirconia restorations have phosphate-based bonding sites, which not only attract the phospholipids in saliva, but will also bind to phosphoric acid (once again, blocking and reducing the number of bonding sites available for an adhesive). For zirconia restorations, alternate cleaning methods such as sandblasting, sodium hypochlorite, or cleaning solutions such as ZirClean (BISCO) or Ivoclean (Ivoclar Vivadent) should be used.
Cleaning solutions such as ZirClean from BISCO or Ivoclean from Ivoclar Vivadent are well-suited for zirconia restorations.

While all methods can be effective, extraoral cleaning solutions go above and beyond. To neutralize the ionic bond between saliva phosphates and zirconia, you need an alkaline solution such as potassium hydroxide (KOH). This is the active ingredient in products such as ZirClean. The KOH reacts with the restoration surface and neutralizes phosphate contamination to expose new bonding sites. While designed for zirconia, it can also be used on ceramic and metal restoration. Plus, has the added benefit of being simple to use-after try-in, rinse the crown, apply ZirClean into it for 20 seconds, rinse again, and then air dry.
Continue reading on the next page...
Dr. Flucke thinks these cleaning solutions are a must, particularly for zirconia restorations. “What we do in my office depends on the restoration material,” Dr. Flucke says. While he cautions that steps can vary depending on the prep, etc., he uses the following steps after try-in.
For zirconia:
- Apply product like ZirClean or Ivoclean
- Rinse
- Apply Peak ZR (Ultradent)
- Fill crown with self-etching resin cement
- Seat crown
For lithium disilicate:
- Etch with hydrofluoric acid
- Apply silane
- Air dry silane
- Fill crown with self-etching resin cement
- Seat crown
For lithium disilicate, it’s also important to note whether or not the restoration came pre-etched. Acid etching with 5 percent hydrofluoric acid or 37 percent phosphoric acid can clean the surface of an all-ceramic crown, but you don’t want to re-etch a crown that was already etched in the lab, as it can weaken the restorative material. For pre-etched restorations, we go back to the alkaline cleaning products to get the decontamination job done.
Winning the battle
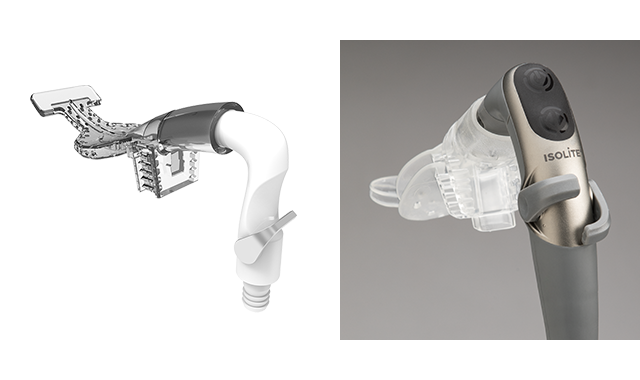
Products like DryShield (left) and Isolate from Zyris (right) isolate the field while acting as a vacuum at the same time.

Of course, once the restoration has been cleaned post try-in, things still have to stay nice and tidy. The field and the restoration need to remain dry and decontaminated-and it’s OK to get some extra help from team members or isolation products.
“I highly recommend four-handed dentistry to cement things,” Dr. Flucke says. “It’s just so much easier that way. Also, things like Isolite and DryShield can make things a lot simpler because they isolate and vacuum all at the same time.”
Dr. Sanders agrees. “Of course, lots of cotton to isolate,” she says. “Getting a good bond relies on isolation as well as decontamination. They are both critical to success.”
So next time you go to seat a crown, consider those two powers combined: You’ve isolated and decontaminated the field, but what good is it if the crown doesn’t get the same treatment? It takes both sides to make a good bond-and after try-in is the perfect time to ensure you’ve taken all the necessary steps to make it happen.
References
1. Aboush YE. Removing saliva contamination from porcelain veneers before bonding. J Prosthet Dent. 1998 Dec;80(6):649-53.
Product Bites – November 10, 2023
November 10th 2023The weekly new products podcast from Dental Products Report is back. With a quick look at all of the newest dental product launches, Product Bites makes sure you don't miss the next innovation for your practice. This week's Product Bites podcast features new launches from Amann Girrbach, DMG, Pac-Dent, and ASI Dental Specialties. [4 Minutes]
ACTIVA BioACTIVE Bulk Flow Marks Pulpdent’s First Major Product Release in 4 Years
December 12th 2024Next-generation bulk-fill dental restorative raises the standard of care for bulk-fill procedures by providing natural remineralization support, while also overcoming current bulk-fill limitations.
Product Bites – October 27, 2023
October 27th 2023Product Bites makes sure you don't miss the next innovation for your practice. This week's Product Bites podcast features new launches from Kerr Dental, MGF, PreXion, ZimVie, Amann Girrbach, VOCO, ASI Dental Specialties, DMG, and NovoDynamics. [8 Minutes]