How to perform full-mouth composite restorations with ACTIVA BioACTIVE
Dr. Cory Glenn demonstrates how to use the restorative material for esthetic composite restorations. Full-mouth rehabilitation can be one of the most intimidating procedures for many dentists. Practitioners are often unsure where to start or what end point they should be working towards.
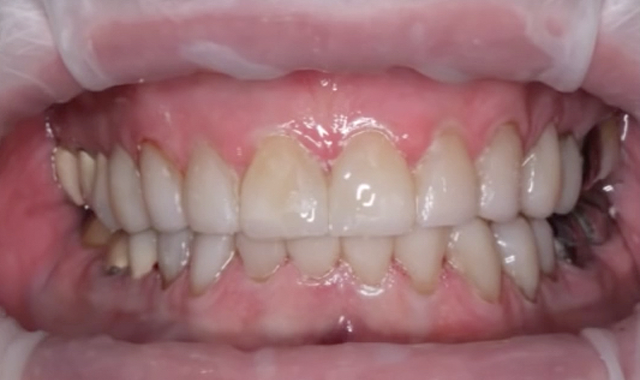
Full-mouth rehabilitation can be one of the most intimidating procedures for many dentists. Practitioners are often unsure where to start or what end point they should be working towards. Deciding whether or not to open the vertical dimension, what changes to make in the esthetics of the case, and how these changes will affect speech, function and comfort cause many dentists to suffer “paralysis by analysis.”
For these reasons, I find it very useful to take a minimally invasive approach by first building the desired end result in composite before proceeding with costly indirect restorations. Restoring in composite is a reversible and usually additive procedure that enables dentists to take a more cautious and methodical approach to large cases.

allow dentists to easily add or remove material until the desired result has been achieved in the composite prototypes. This gives patients time to “test drive” the end product, recommend changes and give final approval to esthetics, speech, comfort and vertical dimension. If there are financial or other concerns, it also enables patients to stage their treatment over a longer time period rather than all at once. The dentist can then prep the mouth in quadrants or sextants, which can make the process more predictable and less stressful.
The following case demonstrates an expedited injection technique for completing a prototype composite full-mouth rehabilitation using ACTIVA BioACTIVE-RESTORATIVE material (Pulpdent Corporation). ACTIVA is esthetic, durable, and ideally suited for the injection technique. Its release of calcium, phosphate and fluoride is beneficial to tooth structure. There is excellent marginal integrity, and a rubberized-resin component resists fracture and chipping. The patient can expect extended service from the ACTIVA restorations, and can proceed with definitive all-ceramic restorations at a later time.
Case study
The patient presented with a history of bruxism and severely worn teeth (Fig. 1). He had already begun faithfully wearing a night guard to control the para function, and he desired to have his teeth restored to their original size and shape. Diagnostic records were taken including numerous photographs to analyze his smile, study models, a face bow (Kois Dento-Facial Analyzer, Panadent), and a centric bite record using a leaf gauge (Great Lakes Orthodontics) at the intended vertical dimension.
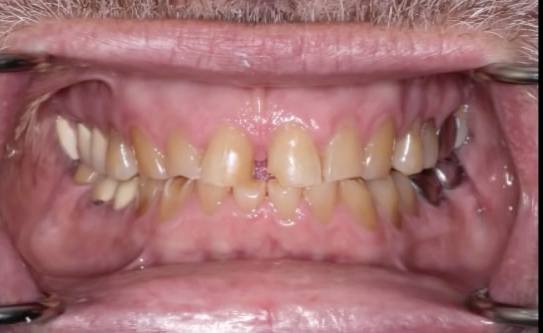
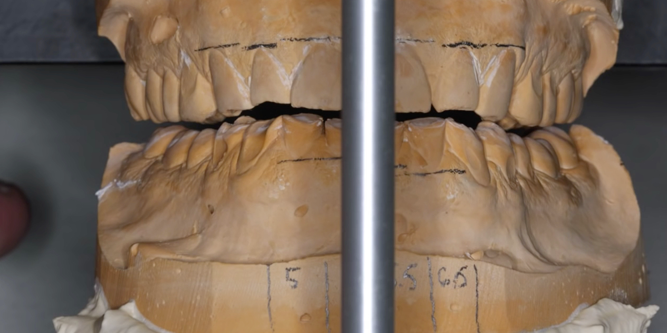
Fig. 1: Patient presented with a history of bruxism and severely worn teeth. Fig. 2: An Ideal mock up
The study models were mounted on a Panadent articulator, and an ideal mockup was made (Fig. 2). It is the author’s experience that when opening the vertical dimension, it is usually only necessary to restore back to the second premolars in the prototype phase.
This allows the molars to function as vertical indexing stops for the template that will be used to create the composite prototypes in the mouth. This shortened dental arch is very stable and comfortable for most patients, and there is always the option to add to the occlusal tables of the molars if occlusal contact is desired.
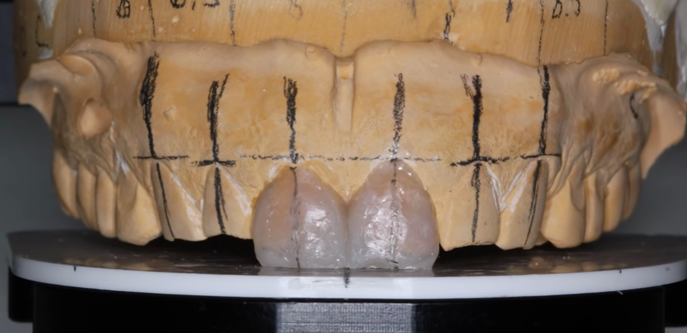
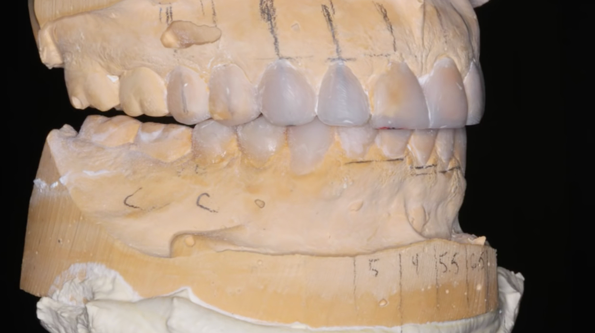
Fig. 3: There was sufficient room to lengthen centrals to an average of 10.5 mm. Fig. 4: Composite resin was used to quickly do the mockup on the cast.
Evaluation of the pre-operative pictures and the length of the central incisors indicated that there was sufficient room to lengthen the centrals to an average of 10.5 mm (Fig.3). The Panadent waxing table was used as a reference for how long to make the rest of the maxillary dentition. Composite resin was used to quickly do the mock up directly on the cast, and once the maxillary dentition was established, the mandibular dentition was completed with attention to proper occlusal contacts and canine disclusion (Fig. 4).
After completing the mock up on the models, pressure formed maxillary and mandibular templates were made over the composite mockup with a 1 mm-thick, clear Biocryl material (Figs. 5 & 6). The clear templates were removed and trimmed to 3 mm above the gingival margin. These templates can be filled with a dual-cured composite and transferred to the mouth, however, this would result in teeth that are joined together. Since the patient was going to wear this for a period of several months or more, it was desirable to break contacts so that he could floss and maintain hygiene.
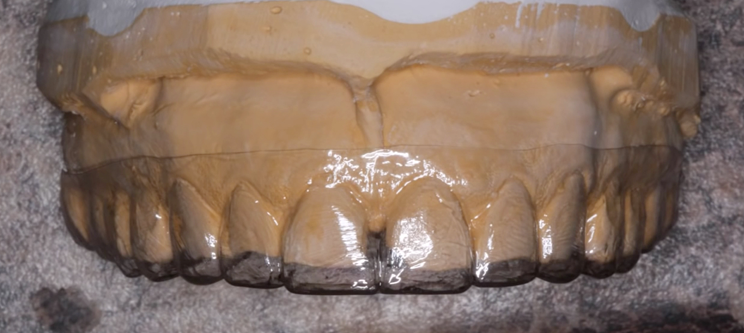
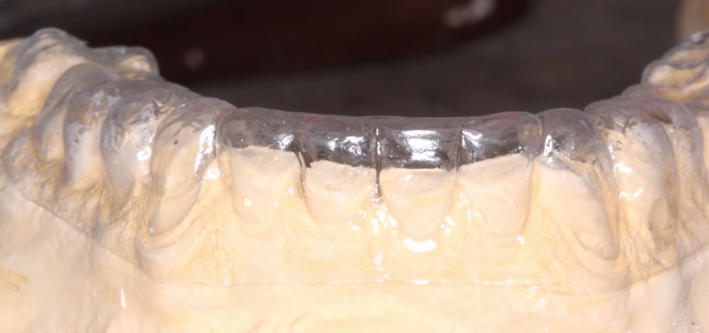
Fig. 5: Pressure formed maxillary template made over the composite mockup. Fig. 6: Pressure formed mandibular template made over the composite mockup.
To separate the teeth, a curved scalpel was used to carefully slit the interproximal areas of the templates to allow for insertion of small mylar strips to maintain patent contacts (Fig. 7). Then, a small round bur was used to create three injection molding holes on the buccal, lingual, and incisal surfaces, which completed the fabrication of the clear transfer templates.
On the day of the procedure, the patient's teeth were cleaned thoroughly with pumice and interproximally with diamond abrasive strips to remove any biofilm that would prevent proper bonding. The clear templates were tried in to verify that they fit properly and indexed correctly onto the untreated molars. Once verified, they were cleaned, dried and set aside until time for bonding.
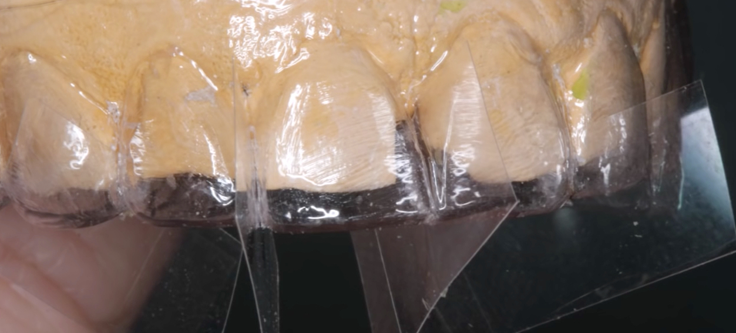
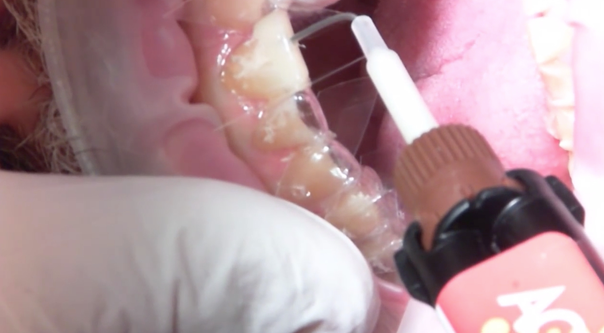
Fig. 7: Small mylar strips are inserted to maintain patent contacts. Fig. 8: Shows injection molding technique using ACTIVA BioACTIVE-RESTORATIVE
The teeth were cleaned one final time with a 20-second scrub using Clean and Boost (Apex Dental), which removes organic debris such as handpiece oil, while simultaneously etching the teeth. The teeth were again rinsed and briefly dried. The template was placed into position and short mylar strips were inserted through the interproximal slits in the template and between the teeth.
The teeth were restored with ACTIVA BioACTIVE-RESTORATIVE material using an injection molding technique. To accomplish this, the ACTIVA mix tip with bendable metal cannula is placed on the ACTIVA syringe, and the metal tip is inserted into the facial or incisal injection ports in the template. By slowly injecting the material until excess extrudes out of the other injection ports, the template is completely filled with the restorative material, and there are no voids (Fig. 8).
ACTIVA is dual cure, and there is sufficient time to inject all the teeth, let the mineral content of the bioactive material react with the tooth surface, and begin the autopolymerization process. Once the arch was injected, the excess was removed and a final light cure was done (Fig. 9) on each tooth to ensure complete polymerization. Some excess will remain at the injection ports and interproximal slits which will lock the template into position, so it is necessary to begin cleaning up the excess using a flame shaped finishing bur until the template can be easily removed (Fig. 10).
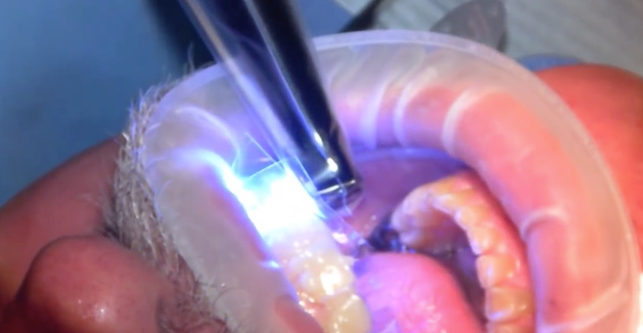
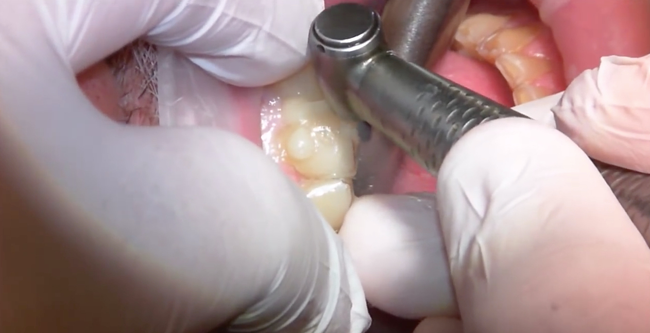
Fig. 9: Final light cure. Fig. 10: Excess is removed.
Continue finishing taking care to remove any flash at the gingival margins and interproximal embrasures. The gross anatomy will conform to the template and require very minimal finishing. Diamond abrasive strips can be used to smooth contacts until they are easily flossed.
Once both arches were completed, the bite was equilibrated using a leaf gauge to get even occlusal contacts on all posterior teeth. Excursive interferences were removed by having the patient perform functional movements on articulating paper. Any interference was adjusted with an egg finishing bur until the patient felt no functional restrictions and his bite was even and comfortable. Only minimal polishing is necessary because the template provides a very smooth surface (Fig. 11).
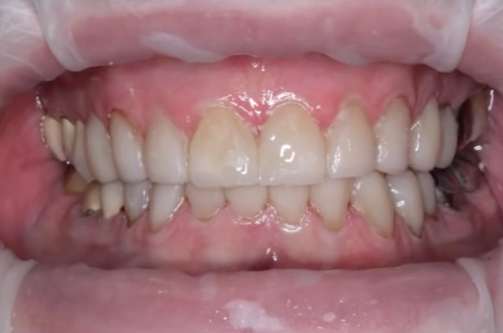
Fig. 11: The completed restoration.
This procedure can allow doctors to quickly create ideal functional prototype restorations that can be worn over extended time periods. In this case, the patient wore these composite restorations for approximately eight months before proceeding with definitive all-ceramic restorations. This process also allowed us to approach the final restorations one sextant at a time since the other teeth already had acceptable occlusion and esthetics, which greatly reduced the challenges for impression making, temporization, and preparation for the definitive ceramic restorations.
By utilizing some creativity and preparation at the beginning of a large restorative case, practitioners and patients can achieve more predictable results. The minimally invasive nature of this technique allows for a reversible approach in the event the patient doesn’t like the prototypes or decides not to move forward with definitive indirect restorations.