How to get better bulk fill results
How to save time and provide improved esthetics with 3M’s latest bulk fill composite.
When it comes to running a dental practice, time is money. Working efficiently, without compromising high-quality clinical results, is one of the main keys to achieving success.
This can be especially true when it comes to performing posterior restorations, which are typically time-consuming procedures. In these cases, I prefer to use bulk fill composites, which are specifically designed to shorten procedure time and provide a strong restoration with high fracture resistance that is also long-lasting and durable.
In the past, bulk fill materials have not been as esthetic as other composites. Fortunately, the world of bulk fill composites has been evolving over the course of the last several years as the popularity of these procedures has increased year after year. This rise in the popularity of bulk fills has led to drastic improvements in the materials that are on the market, which not only save time and decrease patient sensitivity, but also provide impressive esthetics, which means that both myself and my patients are pleased with the final result!
Another main goal that I have in my practice is to be as efficient as possible. Bulk fill composites provide the efficiencies that I require to keep my practice running smoothly. Performing the bulk fill technique allows me to place the composite all in one increment and avoid using multi-layer techniques, which saves time and helps me to complete more restorations.
In the past, bulk fill composites were more translucent, which provided a result that was less esthetic than their counterparts. For the light to reach all the way to the bottom of the restoration, bulk fill material was required to be somewhat translucent to ensure a full cure. Fortunately, 3M’s Filtek™ One Bulk Fill Restorative has an updated formula that turns more opaque as it cures, which means that the final result is not only wear-resistant and durable, but is also extremely esthetic.
Case study
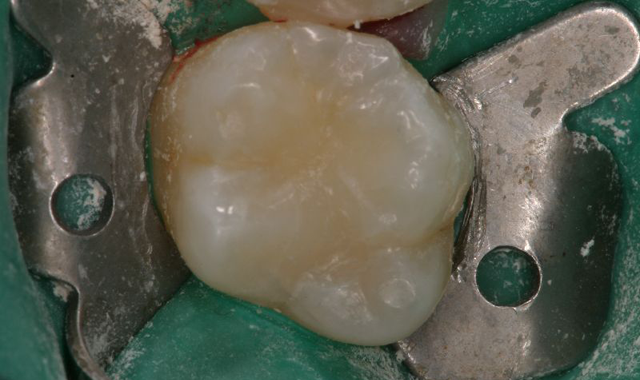
In this case, a 42-year-old male patient presented with decay in the upper left first molar, extending from the distal pit to the central pit. I typically use bulk fill composites when doing posterior restorations, so the treatment plan included my recommendation of using 3M™ Filtek™ One Bulk Fill Restorative.
Step 1: Cavity preparation
The first step was to prep the cavity by completely isolating the tooth. Complete isolation is critical to achieving a successful posterior restoration. If moisture or contamination comes in contact with the tooth while the procedure is taking place, there is a chance that the cavity will be compromised and the restoration will not be successful. Typically, I use rubber dams to provide isolation during posterior restoration procedures.
However, if I am unable to use a rubber dam, my next choice is to use an isolation device, such as the DryShield™ Isolation System. DryShield aides in isolation by combining a high-suction evacuator, saliva ejector, bite block and tongue shield in one device. This product isolates well and is easy to use, and it is a great backup for those who do not want to use a rubber dam. After achieving complete isolation and opening the distal pit, the cavity was prepped and a liner/base material (Vitrebond™ Light Cure Glass Ionomer Liner/Base, 3M) was placed in the deepest area.
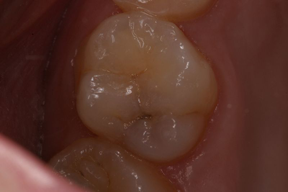
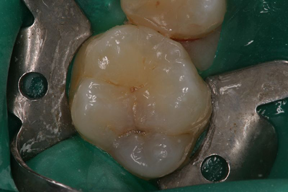
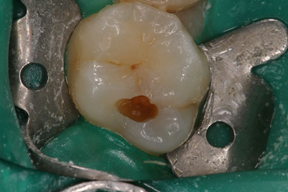
Fig. 1: Pre-operative decay on distal pit of upper left fist molar. Fig. 2: Rubber dam placed around tooth. Fig. 3:Initial opening of the distal pit showing the decay and extension of decay.
Step 2: Etch
Next, it is time to choose which etching technique will work best for each specific restoration. When using 3M™ Scotchbond™ Universal Adhesive, I recommend a selective etch. Although total etch is an option with this product, Scotchbond Universal can be effective without the application of the phosphoric acid to the dentin. Etching the dentin may open up the dentinal tubules, which can cause sensitivity. To avoid the possibility of sensitivity in the tooth, I prefer to use a selective etch technique as often as possible. The enamel was then etched for 15 seconds.
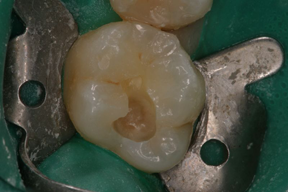
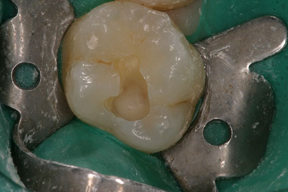
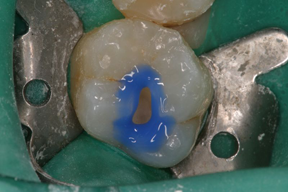
Fig. 4: Cavity was prepped. Fig. 5: 3M™ Vitrebond™ Light Cure Glass Ionomer Liner/Base was placed in deepest area. Fig. 6: Enamel was etched for 15 seconds (dentin was not etched).
Step 3: Apply adhesive
After completing the etch, adhesive was applied to the entire cavity, scrubbed for 20 seconds and air-dried until there was no fluid movement. Next, it was light cured for 10 seconds (Elipar™ DeepCure-S LED Curing Light, 3M). It is critical to make sure the light is positioned close to the surface and that the tooth has been cured completely.
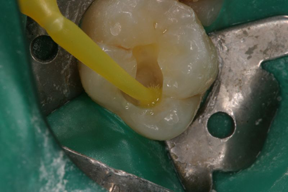
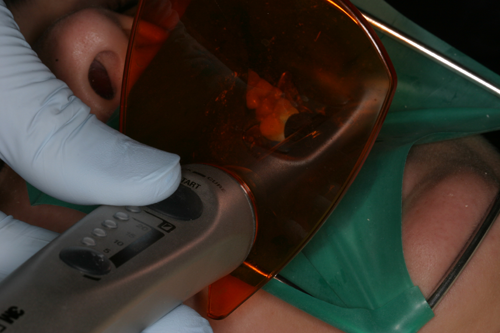
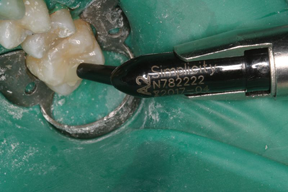
Fig. 7: 3M™ Scotchbond™ Universal was applied to the entire cavity, scrubbed 20 seconds and air-dried until there was no fluid movement. Fig. 8: Tooth was light cured for 10 seconds using 3M™ Elipar™ DeepCure-S LED Curing Light. Fig. 9: 3M™ Filtek™ One Bulk Fill Restorative was placed in tooth.
Step 4: Placement of bulk fill composite
After light curing the adhesive, I placed 3M™ Filtek™ One Bulk Fill Restorative into the cavity. One of the key benefits of Filtek One is the ability to place it in one increment, up to 5 mm. Eliminating the need to use a multi-layer technique when performing bulk fill restorations not only saves time and increases efficiency, but it is also more comfortable for my patients.
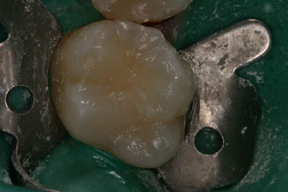
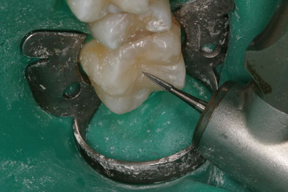
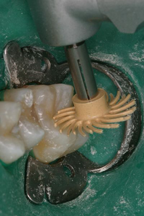
Fig. 10: Restoration after placement of composite prior to finishing. Fig. 11: Carbide was used to begin finishing restoration. Fig. 12: Pe-polishing using 3M™ Sof-Lex™ Spiral Finishing Wheel (beige).
Step 5: Finishing and polishing
Finally, a carbide bur was used to sculpt and shape the restoration. Filtek One is highly adaptable to the cavity, so it fits the tooth anatomy very closely and allows minimal finishing. Once the material had been shaped properly, I used the 3M™ Sof-Lex™ Spiral Finishing and Polishing Wheels to polish the restoration. This two-step system is easy to use because it includes both a spiral finishing wheel to smooth and remove scratches, as well as a spiral polishing wheel that provides complete gloss-like restorations in a re-usable rubberized system.
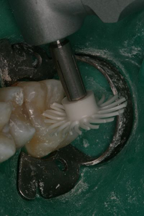
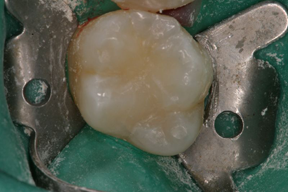
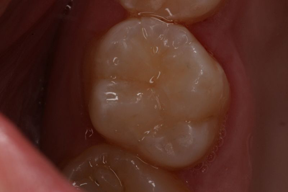
Fig. 13: Polishing using 3M™ Sof-Lex™ Spiral Polishing Wheel (white). Fig. 14: Final restoration with rubber dam placed. Fig. 15: Final restoration without rubber dam placed.
Conclusion
The overall result of this case is a reliable restoration that took minimal time and effort, while also satisfying the patient. As bulk fill composite procedures continue to grow in popularity, it is more important than ever to use efficient and esthetic products that will keep both you and your patients happy. 3M™ Filtek™ One Bulk Fill Restorative is my top choice of composite for most of my posterior restorations, as long as it is not deeper than 5 mm. Filtek One can be placed in one increment, is easy to handle and the final result is an esthetically pleasing posterior composite.
Product Bites – November 10, 2023
November 10th 2023The weekly new products podcast from Dental Products Report is back. With a quick look at all of the newest dental product launches, Product Bites makes sure you don't miss the next innovation for your practice. This week's Product Bites podcast features new launches from Amann Girrbach, DMG, Pac-Dent, and ASI Dental Specialties. [4 Minutes]
ACTIVA BioACTIVE Bulk Flow Marks Pulpdent’s First Major Product Release in 4 Years
December 12th 2024Next-generation bulk-fill dental restorative raises the standard of care for bulk-fill procedures by providing natural remineralization support, while also overcoming current bulk-fill limitations.
Product Bites – October 27, 2023
October 27th 2023Product Bites makes sure you don't miss the next innovation for your practice. This week's Product Bites podcast features new launches from Kerr Dental, MGF, PreXion, ZimVie, Amann Girrbach, VOCO, ASI Dental Specialties, DMG, and NovoDynamics. [8 Minutes]